How to Pack Your Hiking Backpack Properly
Knowing what to bring is only half the job. How you pack it changes how comfortable your hike feels, especially once you’re a few miles in.
Heavy gear (water, food, a bear canister if you’re carrying one) belongs in the middle of your pack, close to your back. This keeps your center of gravity stable instead of pulling you backward or to one side.
Lightweight, bulky gear, like an extra layer you’re not using yet or a sleeping bag on an overnight trip, goes toward the bottom. You won’t need it until camp, so it doesn’t need to be quick to reach.
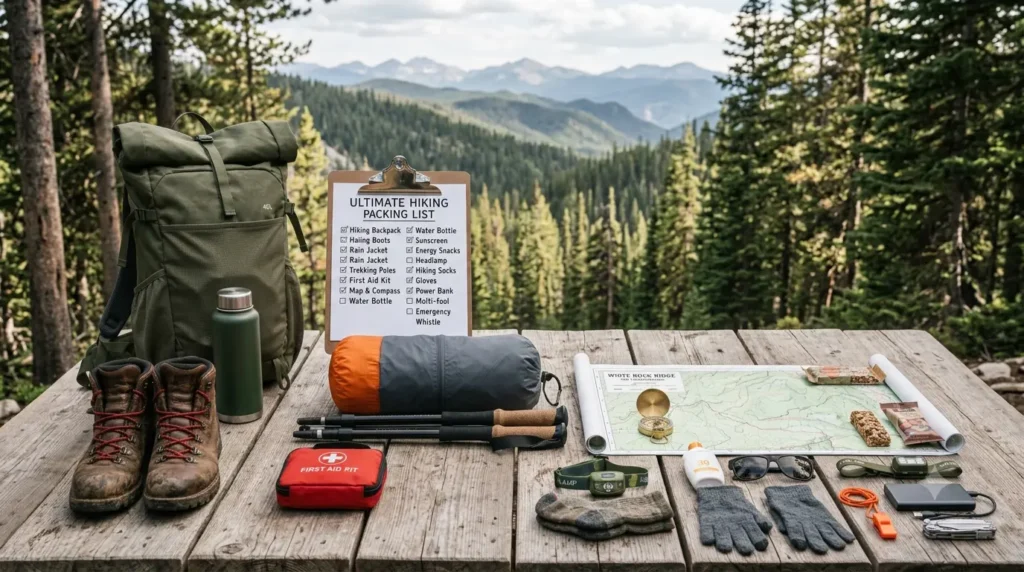
Frequently used items, think snacks, sunscreen, your map, or a rain jacket, belong in the top pocket or side pockets where you can grab them without taking the whole pack off.
Emergency gear, like your first aid kit, whistle, and headlamp, should live somewhere consistent every time you hike, usually a hip belt pocket or a dedicated top pocket. If you ever need it in a hurry, you don’t want to be digging.
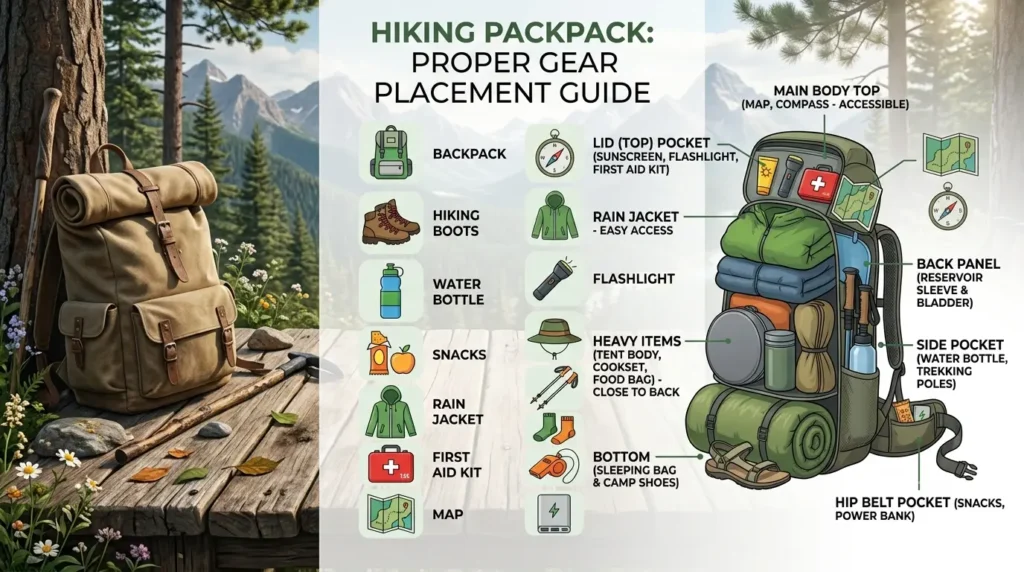
For waterproof organization, a pack liner or a few dry bags keep your clothing and electronics dry even if it rains or you set your pack down in wet grass. This matters more on multi-day trips, but it’s a smart habit for day hikes too. If you’re still deciding on a pack that fits this kind of setup well, our hiking backpack guide for women covers what to look for.
Quick packing checklist:
- Bottom: sleeping bag, gear you won’t need until camp
- Middle, close to your back: water, food, heaviest items
- Top pocket: rain jacket, snacks, map
- Side pockets: water bottle, trekking poles
- Hip belt pockets: first aid basics, whistle, phone
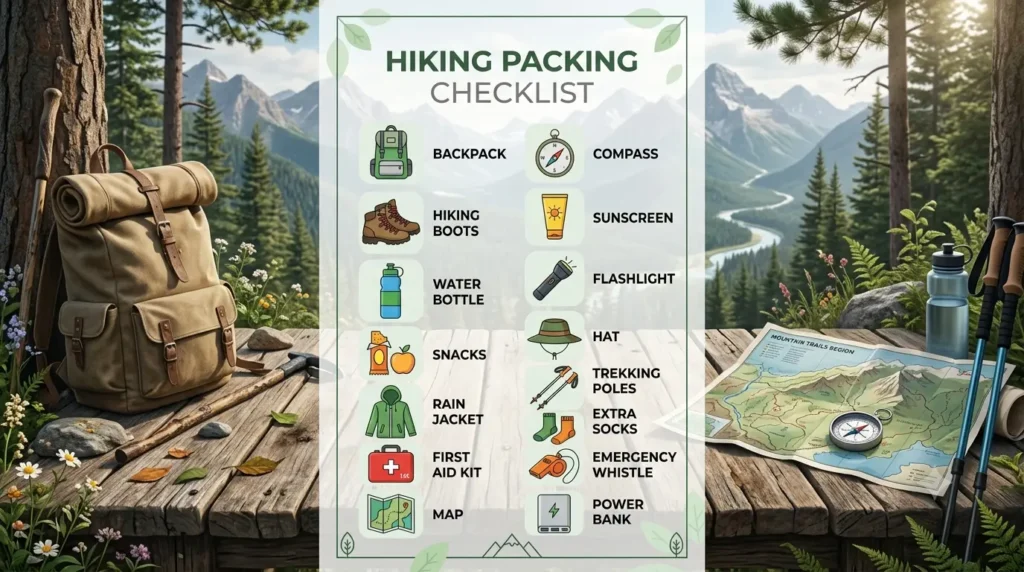
Explore My Hiking Essentials Collection
Ready to start building your hiking kit? I’ve organized all the essential gear featured in this guide into one easy-to-browse Amazon collection, including hiking backpacks, boots, rain jackets, trekking poles, water bottles, first aid kits, and other trail essentials.
Disclosure: As an Amazon Associate, I earn from qualifying purchases at no additional cost to you.
Hiking Packing List by Hike Duration
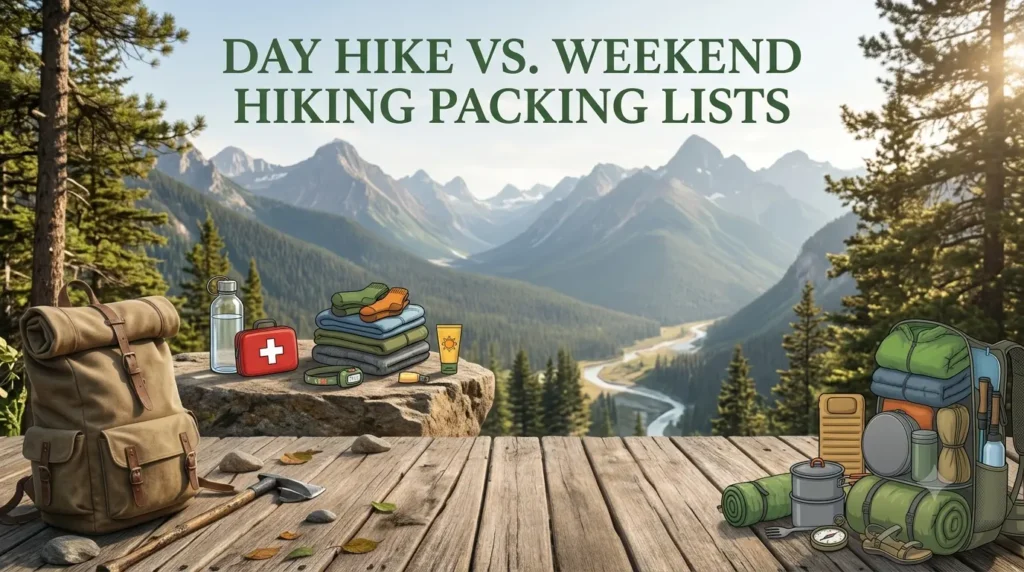
How much you pack should scale with how long you’ll be out. A two-hour walk and a multi-day backpacking trip don’t call for the same gear, even if the trail is the same one.
2-Hour Hike
Keep it simple: water, your phone, a light snack, and basic first aid. Trails close to home or a trailhead with cell signal don’t need much beyond that.
Half-Day Hike
Add more water, sun protection, and a light, packable rain layer. You’re out long enough that weather has more time to shift, so it’s worth planning for it.
Full-Day Hike
This is where the full day hiking packing list from earlier in this guide applies: a proper daypack, navigation tools, an extra layer, and a headlamp in case you’re out later than planned.
Weekend Hike
Overnight gear enters the picture, along with more food and a plan for water refills. If you’re hiking with a group, it’s worth splitting shared gear like a water filter or first aid kit to save weight.
Multi-Day Backpacking Trip
Multi-day trips need a full sleep system, a reliable water purification method, and a food plan for each day, not just snacks. It’s also worth knowing how to care for your sleeping bag once you’re back, since a poorly maintained one loses insulation over time. Backpacking also comes with its own set of considerations compared to car camping. If you’re weighing the two, our backpacking vs. camping guide breaks down the difference, and this list of camping snacks is a solid starting point for planning food that travels well.
| Category | 2-Hour | Half-Day | Full-Day | Weekend | Multi-Day |
|---|---|---|---|---|---|
| Water | 1L | 1–2L | 2–3L | Refill plan | Filter/purifier |
| Food | Light snack | Snacks | Snacks + meal | Meals per day | Full food plan |
| Extra Layer | Optional | Light layer | Yes | Multiple | Multiple + insulation |
| Navigation | Phone | Phone + map | Map + compass | Map + compass | Map + compass + backup battery |
| Shelter/Sleep | Not needed | Not needed | Not needed | Tent + sleep system | Tent + sleep system |
At a glance, the progression is straightforward:
- 2-hour hike: water, snack, phone
- Half-day: add sun protection and a light layer
- Full-day: add navigation, first aid, and a headlamp
- Weekend: add a sleep system and more food
- Multi-day: add a water purification plan and a full food strategy
Hiking Packing List by Season
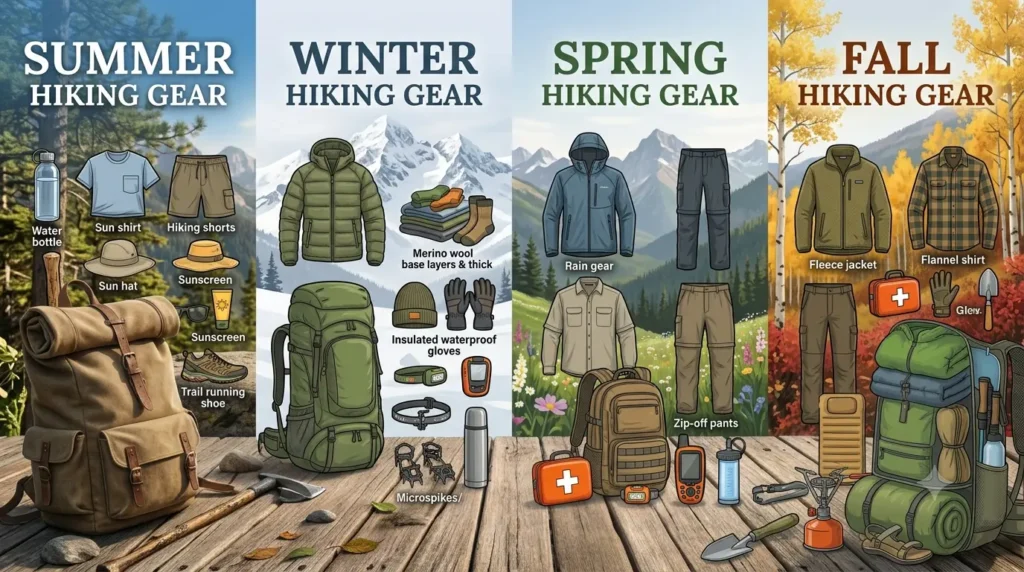
Do you need different gear for each season? Yes, mostly around layering, sun and water needs, and daylight hours. The trail itself might stay the same year-round, but what you pack for it shouldn’t.
Summer Hiking
Heat and sun exposure are the main things to plan around. Pack extra water, electrolytes for longer or hotter hikes, and moisture-wicking clothing that dries fast. Starting early in the day helps you avoid peak heat. A sun hat and UV protection matter even on trails with some shade. For outfit ideas built around summer conditions, this summer hiking guide and this roundup of hiking shorts are good starting points, and breathable summer socks help with blister prevention when your feet run hot.
Winter Hiking
Cold weather hiking depends on a solid layering system, more on that below, plus traction devices for icy sections and a headlamp that isn’t optional, since daylight hours are shorter. An emergency shelter, even a simple one, is worth carrying in case conditions turn. Regular snow boots aren’t built for long-distance walking the way hiking-specific boots are; if you’re unsure what the difference actually is, this comparison lays it out. For outfit planning, our winter hiking guide covers layering in more detail.
| Layer | Job | Common Materials |
|---|---|---|
| Base Layer | Moves sweat off your skin | Merino wool, synthetic blends |
| Mid Layer | Traps warmth | Fleece, wool, synthetic insulation |
| Outer Shell | Blocks wind and rain | Waterproof or water-resistant fabric |
Spring Hiking
Mud and unpredictable weather define spring hikes. Waterproof or water-resistant footwear helps a lot here; if you’re not sure whether you need it, this comparison and this lightweight waterproof boot roundup can help you decide. Spring is also when ticks become more active in many regions, so checking for them after a hike is worth the habit; the CDC’s tick prevention guidance is a solid reference. In some regions, spring also means increased wildlife activity, including bears coming out of winter dormancy.
Fall Hiking
Shorter days mean a headlamp becomes more important, even on hikes you don’t expect to finish in the dark. Morning-to-afternoon temperature swings are common, so layering still matters. In areas where hunting season overlaps with hiking season, wearing blaze orange is a simple, practical safety step. For wet fall weather, a hooded rain jacket and a packable rain hat are worth having in your pack.
| Season | Key Gear Addition | Main Consideration |
|---|---|---|
| Summer | Electrolytes, sun hat | Heat and hydration |
| Fall | Headlamp, rain layer | Shorter daylight |
| Winter | Traction devices, emergency shelter | Cold and ice |
| Spring | Waterproof footwear | Mud and wildlife activity |
Hiking Packing List by Trail Difficulty
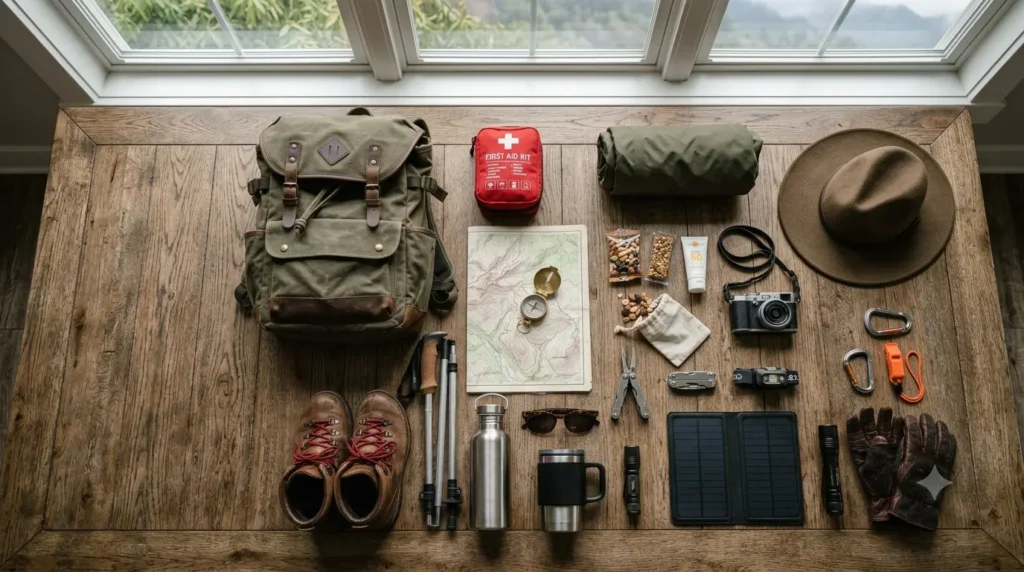
Trail difficulty changes what’s worth carrying almost as much as distance does. A flat, well-marked path and a steep mountain route call for different levels of preparation.
Easy Trails
Well-maintained, low-elevation trails are a good fit for beginners and families. The basics, water, snacks, and a phone, usually cover it.
Moderate Trails
More elevation gain means more effort and more water. Trekking poles are worth considering here, and supportive footwear starts to matter more than it does on flat ground.
Difficult Mountain Trails
Significant elevation gain, fast-changing weather, and limited cell signal all raise the stakes. An emergency shelter and extra layers matter more here, and in bear country, such as parts of the Rockies or the Sierra Nevada, bear spray is worth researching for the specific area you’re visiting. Destinations like Colorado’s high-elevation trails or New Hampshire’s White Mountains are good examples of terrain where this level of preparation matters.
Rocky Trails
Uneven, rocky terrain puts more demand on your footwear and your footing. Shoes with a wider toe box can help on steep, rocky descents, and supportive, waterproof footwear helps on trails that mix rock with water crossings.
National Park Hikes
National parks often come with their own rules: permits, food storage requirements, and posted wildlife alerts. Checking the National Park Service website for your specific park before you go is worth the five minutes, especially during busy seasons when trailhead parking fills up early.
| Difficulty | General Guide | Extra Gear to Consider |
|---|---|---|
| Easy | Flat, well-marked | None beyond the basics |
| Moderate | Some elevation gain | Trekking poles, more water |
| Difficult | Steep, high elevation gain | Emergency shelter, extra layers |
| Rocky | Uneven footing | Supportive, grippy footwear |
Leave No Trace Hiking Tips
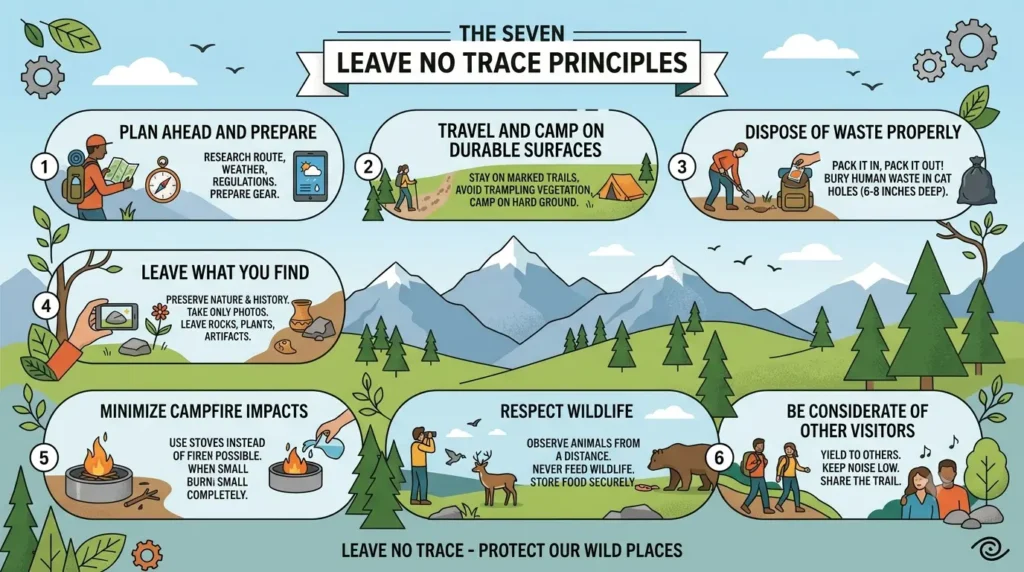
What is Leave No Trace? It’s a set of seven outdoor ethics principles designed to help hikers minimize their impact on trails and wildlife. Following them keeps trails healthy for future visitors and protects the plants and animals that call them home.
- Plan Ahead and Prepare. Check the weather and trail conditions, and pack the right gear for the trip. Most Leave No Trace problems start with a lack of preparation.
- Travel and Camp on Durable Surfaces. Stick to marked trails instead of cutting switchbacks, which causes erosion and damages plant life around the trail.
- Dispose of Waste Properly. Pack out all trash, including food scraps. If you need to go to the bathroom, do it well away from water sources and trails.
- Leave What You Find. Skip picking flowers, rocks, or artifacts. Small as it seems, it adds up when thousands of hikers do the same thing.
- Minimize Campfire Impacts. Use established fire rings where allowed, or consider a camp stove instead. Always check for fire bans before your trip.
- Respect Wildlife. Observe animals from a distance, store food properly, and never feed wildlife, even if it seems harmless.
- Be Considerate of Other Visitors. Yield to other hikers appropriately, keep noise down, and manage pets so they’re not disturbing wildlife or other people.
Common Hiking Packing Myths
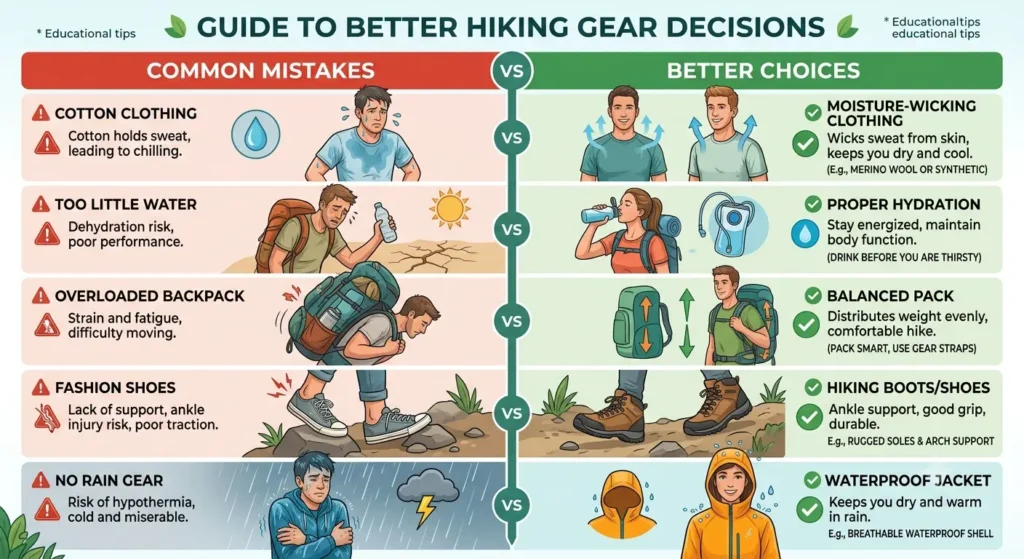
A few packing myths stick around even though they don’t hold up on the trail. Here’s what’s actually true.
| Myth | Reality |
|---|---|
| More gear is always better | Extra weight adds fatigue without adding safety. Pack based on trip length and conditions, not worst-case what-ifs. |
| Cotton clothing is fine for hiking | Cotton holds moisture and dries slowly, which can lead to chafing and, in cold weather, faster heat loss. Moisture-wicking fabrics perform better. |
| Phone GPS is enough for navigation | Battery life, cold weather, and dead zones can all knock out phone navigation. A paper map and compass are a reliable backup. |
| Waterproof shoes work for every trail | Whether you need waterproof footwear depends on the trail and season. They help in mud and wet terrain but can run warm on dry summer trails. |
| Regular snow boots work for winter hikes | Snow boots are built for standing, not walking distance, and often lack the tread and support hiking-specific boots offer. |
| Trekking poles are only for older hikers | Poles reduce knee strain on descents and improve balance on uneven ground for hikers of any age or fitness level. |
Hiking Safety Checklist Before Leaving Home
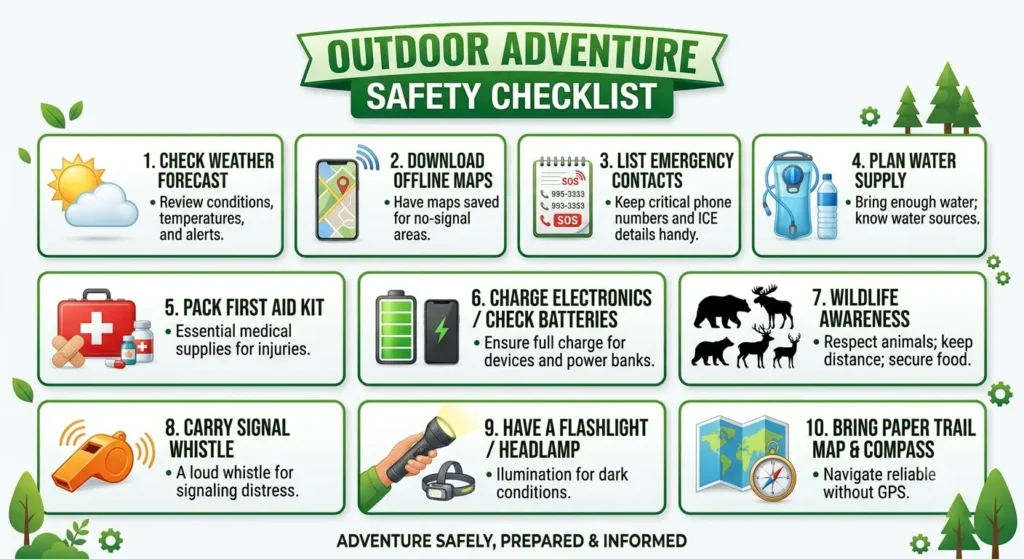
A few minutes of prep before you leave the house can prevent most of the situations that turn a hike into an emergency. Outdoor recreation is generally safe, but a little planning goes a long way.
- Check the weather for the trailhead’s elevation specifically, not just the nearest town. Conditions can be very different higher up. NOAA’s National Weather Service is a reliable source.
- Check trail conditions through the park or forest service website. The US Forest Service and National Park Service both post closures and alerts.
- Share your route and expected return time with someone who isn’t hiking with you.
- Download offline maps in case you lose signal partway through the hike.
- Charge your phone fully, and bring a portable charger for longer hikes.
- Plan your water needs based on distance, elevation gain, and forecasted temperature.
- Check wildlife alerts, like recent bear activity, especially in national parks or backcountry areas.
Beginner Hiking Tips
- Start with shorter trails. Build confidence and endurance before tackling longer or steeper routes.
- Break in your footwear. Wear new boots or shoes on short walks before a long hike to avoid blisters, and make sure they’re fitted correctly from the start.
- Check the weather twice. Once the night before, and again the morning of your hike.
- Pace yourself on climbs. A slower, steady pace uses less energy than stopping and starting.
- Learn to read a trail map. Spotting elevation changes and trail junctions helps you stay on route.
- Pack more water than you think you need. It’s one of the easiest things to run short on.
- Wear moisture-wicking socks. Cotton socks tend to hold moisture and contribute to blisters.
- Tell someone your plan. Share your route and expected return time before you leave.
- Bring snacks with protein and carbs. They keep your energy steadier than sugar alone.
- Layer your clothing. It’s easier to adjust to temperature swings with layers than one heavy jacket. Our hiking outfit guide has ideas for putting a layering system together.
- Know your turnaround time. Decide in advance when you’ll head back, regardless of how far you’ve gotten.
- Respect trail closures and signage. They’re usually posted for safety or conservation reasons.
- Practice with your full pack. A short test hike helps you spot fit or weight issues before a big trip.
- Keep your phone accessible, but don’t rely on it alone. Battery and signal aren’t guaranteed on trail.
- Start early in the day. You’ll beat the heat, afternoon storms, and crowded trailheads.
What’s the best time of day to start a hike?
Morning is generally the best time to start. You’ll avoid peak heat, afternoon thunderstorms are more common later in the day in many regions, and popular trailheads are less crowded early on.
How do I know if a trail is too difficult for me?
Check the distance and elevation gain before you go, and read recent trip reports on a trail app if you can. If you’re new to hiking, start with shorter, lower-elevation trails and work up from there rather than guessing.
Do I need a paper map if I already have a GPS app?
Yes. GPS apps are convenient, but phone batteries die and signal drops in a lot of hiking areas. A paper map and compass don’t depend on power and work as a reliable backup.
What should I do if I get lost on a trail?
Stop moving and stay calm. Try to retrace your last known route using a map or your offline app. If you can’t get back on track, stay put, use a whistle to signal for help, and wait rather than wandering further.
Is it safe to hike alone?
Many people hike alone safely, but it calls for extra precaution. Choose well-traveled trails, share your route and return time with someone, and consider carrying a way to call for help where cell signal isn’t reliable.
What’s the difference between a base layer, mid layer, and outer shell?
A base layer wicks sweat away from your skin. A mid layer, like fleece or wool, traps warmth. An outer shell blocks wind and rain. Together, they let you adjust to changing conditions instead of relying on one heavy jacket.
How do I prevent blisters on a long hike?
Make sure your footwear fits properly and is broken in before the trip. Moisture-wicking socks help too. If you feel a hot spot forming, address it with tape or a blister pad right away instead of waiting.
Do I need trekking poles?
They’re not required, but they help reduce knee strain on descents and improve balance on uneven or rocky terrain. They’re worth considering for longer or steeper hikes.
What is elevation gain and why does it matter?
Elevation gain is the total amount of climbing over the course of a hike. A trail with high elevation gain takes more time and effort than its distance alone suggests, and it affects how much water and how many layers you should pack.
How much food should I pack for a hike?
It depends on the length and intensity of your hike, but a commonly cited guideline is roughly 200 to 300 calories per hour of hiking for longer trips. Pack a bit extra as a buffer in case you’re out longer than planned.
What should I wear hiking in the rain?
A waterproof rain jacket, a moisture-wicking base layer instead of cotton, and waterproof footwear are the main pieces. Packing an extra dry layer helps too, in case you get chilled after getting wet.
How do I stay safe from wildlife while hiking?
Store food properly, make noise on blind corners or in dense brush, and give any animals you encounter plenty of space. Never approach or feed wildlife, and check local guidance for the area you’re hiking in.
What’s the best way to cross a stream while hiking?
Look for a shallow, wide crossing point rather than the narrowest one. Unclip your pack’s hip belt before crossing so you can shed it quickly if needed, and use trekking poles for extra balance.
Should kids carry their own hiking gear?
A small, lightweight pack with a few personal items, like a water bottle and a snack, can help kids feel involved and build independence. Keep the load light and appropriate for their age and hiking experience.
How do I check trail conditions before I go?
Check the park or forest service website for your specific trail, along with recent trip reports on hiking apps. Both usually list closures, washouts, or other hazards before you head out.